Setups
Overview of how to create and manage Setups in Typhoon Test Hub.
A Setup is a group of HIL devices and DUTs which will be used "as a unit" to run certain tests. Setups are an important component of Typhoon Test Hub. The Job Execution Queue is based on Setup availability. During Job creation you can inform which Setup should be used by that execution.
- IP addresses of those HIL devices will populate the TTH_SETUP_HIL_IP variable, where the IP addresses will be separated using a comma, for example: 192.168.0.80, 192.168.0.81, 192.168.0.82
- Serial numbers of those HIL devices will populate the TTH_SETUP_HIL_SN variable, where the serial numbers will be separated using a comma, for example: 00604-11-12345, 00402-07-12345.
If your Setup is connected to the network, it can also be visible and available for manual testing. It is possible to reserve a Setup (item under the Action column), so the Hub will not start any executions with that Setup.
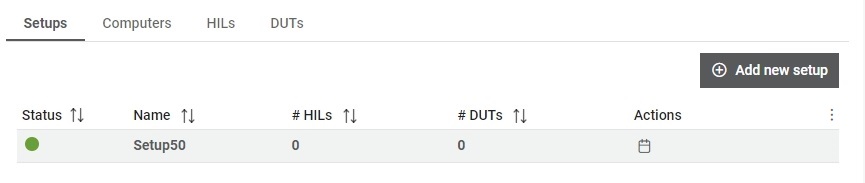
The Setups table shows the following information:
- Status: Available, Offline, Busy and Blocked.
- Name
- Number of HILs
- Number of DUTs
- Number of Computers
From this table, you can also click the 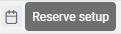 button, which will reserve the setup for only the current user. Once reserved, it will
show icon next to status like this:
button, which will reserve the setup for only the current user. Once reserved, it will
show icon next to status like this:

By clicking the  button, a user with a reserved Setup can make
it available again for other users.
button, a user with a reserved Setup can make
it available again for other users.
 button, columns of the table
can be customized - hidden or shown depending on the preference. Columns of the table
can be reordered by using drag and drop in the table header. When positioning cursor in
between two columns, cursor for column resizing will show and enable change of the
column's width. All changes made to the table will be automatically preserved.
button, columns of the table
can be customized - hidden or shown depending on the preference. Columns of the table
can be reordered by using drag and drop in the table header. When positioning cursor in
between two columns, cursor for column resizing will show and enable change of the
column's width. All changes made to the table will be automatically preserved. Setup details
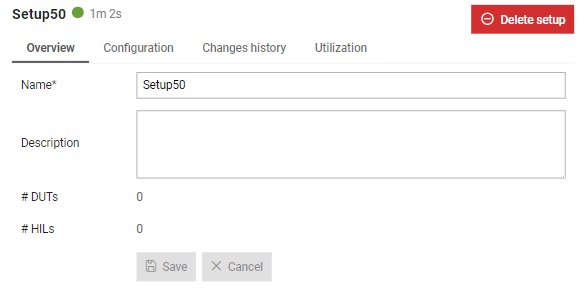
In the Details section (Figure 2), you can find the following tabs:
- Overview tab: Here you can update the name and description of setups, as well as see the number of HILs and DUTs that are in the setup.
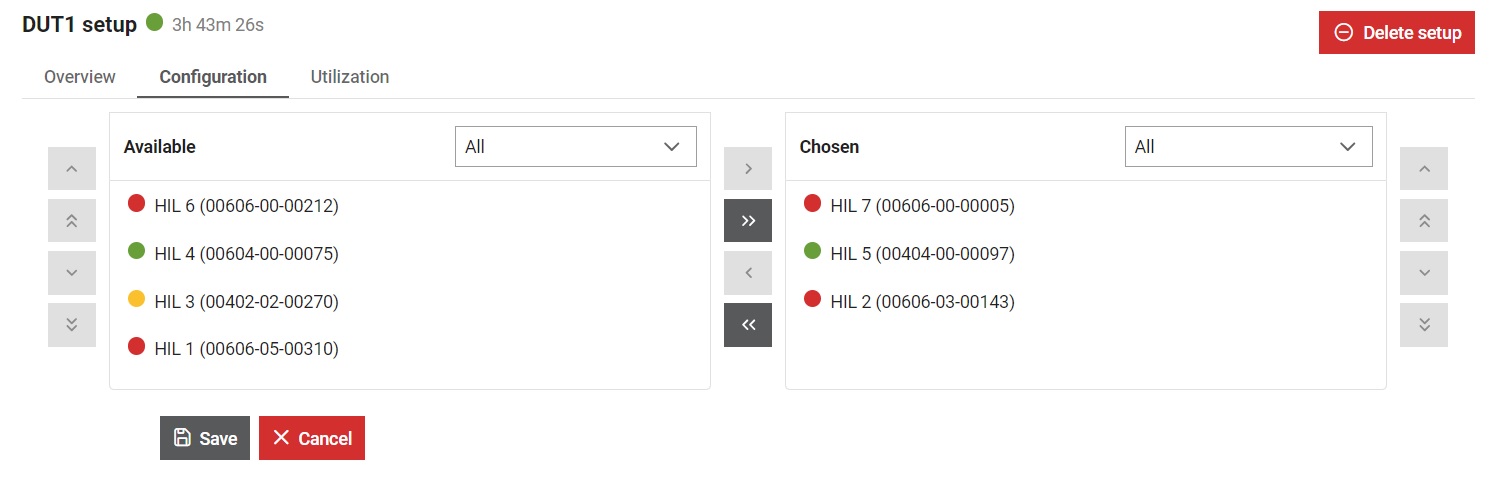
- Configuration tab: This tab is shown in Figure 3. Here you can configure a Setup by
selecting the available HILs and DUTs that you want and dragging and dropping
them from the Available devices (left) into the
Chosen setup (right). Alternatively, you can use the
 and
and  arrows to move a single element
from one list to the other, or use the
arrows to move a single element
from one list to the other, or use the  and
and  arrows
to move all elements from one list to the other. You can also manipulate the
order of elements in the list by selecting an element and using the
arrows
to move all elements from one list to the other. You can also manipulate the
order of elements in the list by selecting an element and using the  and
and  arrows to move it up/down one
place, or the
arrows to move it up/down one
place, or the  and
and  arrows to move the element to the
top/bottom of its list.
arrows to move the element to the
top/bottom of its list. - Changes history tab: Contains setup's history of changes.
- Executions tab: Here you can see all executions that used the selected setup.
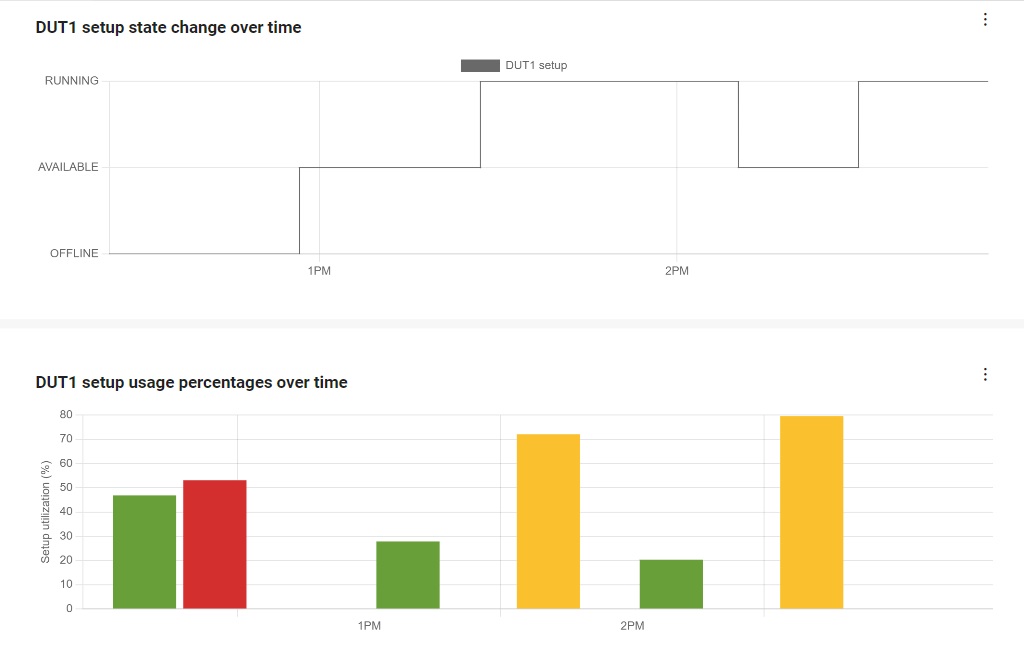
- Figure 4 tab: Shows setup's utilization.
In the details section, you can delete a setup by
clicking on the  button.
Create setup
A new setup can be added by clicking on the  button.
This opens a form where you can define the properties of your new setup (Figure 5).
button.
This opens a form where you can define the properties of your new setup (Figure 5).
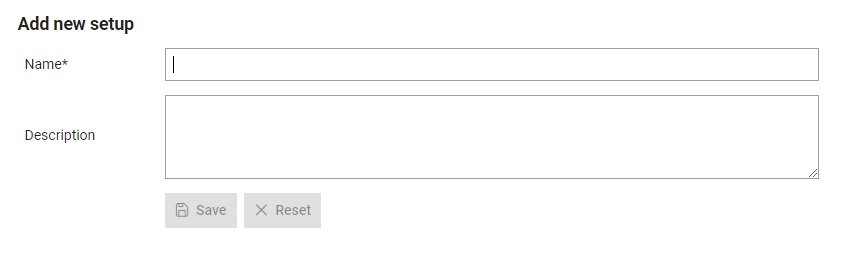
To finish creating a setup, you must:
- Give it a name which will be used to refer to it throughout Typhoon Test Hub. Each name must be unique.
- Write a description for the setup.
Changes history tab
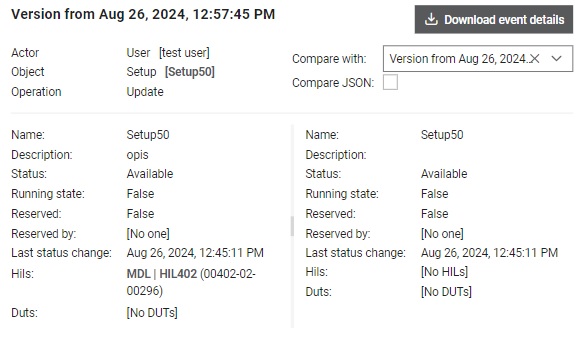
Changes history for the selected Setup is visible from this tab (Figure 6).
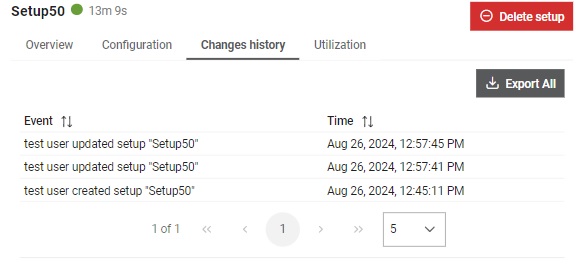
All snapshots (events) will be exported to JSON format and automatically downloaded
by clicking on the  button.
By selecting each line in the table, single snapshot will be shown enabling preview of the made changes
and allowing user to perform comparison between the selected snapshot and and any chosen snapshot.
button.
By selecting each line in the table, single snapshot will be shown enabling preview of the made changes
and allowing user to perform comparison between the selected snapshot and and any chosen snapshot.
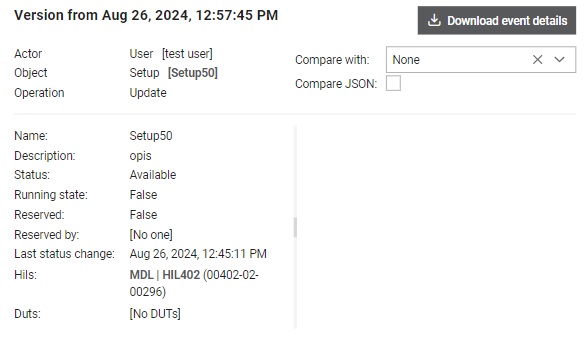
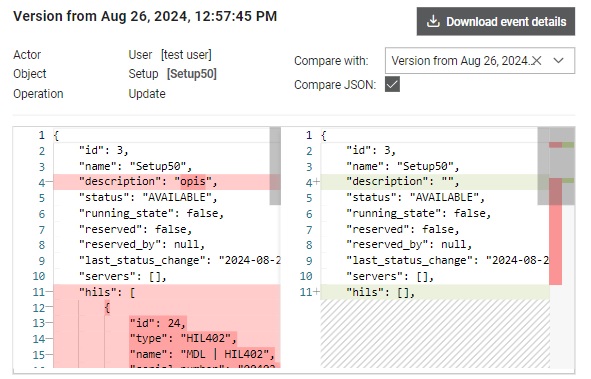
Single snapshot (event) can be exported as JSON and downloaded by clicking on the
 button. Snapshots can be compared through UI or as JSON, with JSON option having
more clearly displayed differences between the two snapshots using Monaco
editor.
button. Snapshots can be compared through UI or as JSON, with JSON option having
more clearly displayed differences between the two snapshots using Monaco
editor.