Computers
Overview of how to manage Computers, accessible in the Configure section in Typhoon Test Hub.
A computer is a machine where Officer will run and manage an Agent. You can find the most important information about and perform actions on computers in the Computer table (Figure 1), including create a new computer, update a computer, or delete an existing one. The Computer overview also contains data for connecting Officer with a computer. Additional information is available in the Utilization tab.
When a computer is connected, it appears as  . If the docker exists on the machine where Officer is running, then the tabs Containers and Images
are also visible.
. If the docker exists on the machine where Officer is running, then the tabs Containers and Images
are also visible.
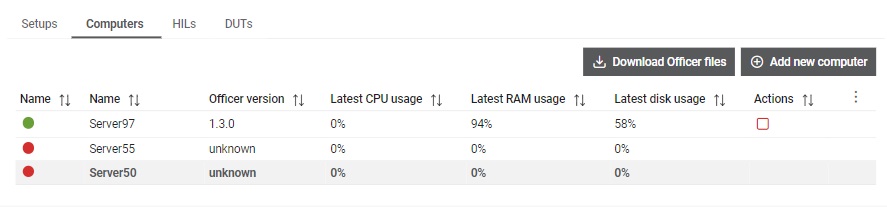
The Computers table shows the following information:
- Status: Available and Offline.
- Name: Computer name
- Officer version: Currently used version of the Officer. If the Officer was not previously ran or if it does not provide information about the version (before TTH version 1.3.0), version will be set to unknown in the table until the first connection of the Officer.
- Latest CPU usage [%]
- Latest RAM usage [%]
- Latest disk usage [%]
Additionally you can Disconnect a computer directly from the table
by cliking on the  button, which will shutdown Officer on that computer. You can also
Restart a computer directly from the table by clicking on the
button, which will shutdown Officer on that computer. You can also
Restart a computer directly from the table by clicking on the
 button,
which will restart Officer on that computer.
button,
which will restart Officer on that computer.
By clicking on the  button, the Officer application distribution (downloaded
file is called
button, the Officer application distribution (downloaded
file is called typhoon-officer.zip) is downloaded. It can be used to
connect a computer to Typhoon Test Hub which would turn the computer status to
online.
 button, columns of the table
can be customized - hidden or shown depending on the preference. Columns of the table
can be reordered by using drag and drop in the table header. When positioning cursor in
between two columns, cursor for column resizing will show and enable change of the
column's width. All changes made to the table will be automatically preserved.
button, columns of the table
can be customized - hidden or shown depending on the preference. Columns of the table
can be reordered by using drag and drop in the table header. When positioning cursor in
between two columns, cursor for column resizing will show and enable change of the
column's width. All changes made to the table will be automatically preserved. Computer details
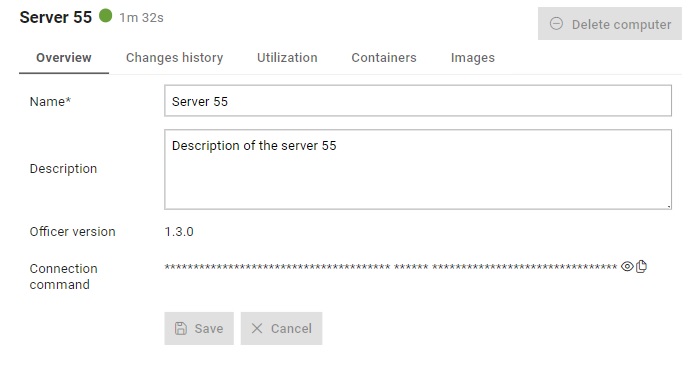
In the Details section (Figure 2), you can find:
- Overview tab: Here you can update a Computer's name,
description and Typhoon license, as well as see its Connection command, Officer
version, Operating system, Processor, number of CPU cores, amount of RAM and
Disk space. Connection to Officer is established using the URL, Connection token
and Connection secret all combined in the Connection command shown in the
details and its value can be copied by clicking on the
 button. Value of the
Connection command is not visible by default. Note: Same as for the Officer version, information about the Operating System, Processor, CPU cores, RAM and Disk space will be unknown up until Oficcer's first connection.
button. Value of the
Connection command is not visible by default. Note: Same as for the Officer version, information about the Operating System, Processor, CPU cores, RAM and Disk space will be unknown up until Oficcer's first connection. - Changes history tab tab: Contains computer's history of changes.
- Utilization tab: This tab displays computer CPU and RAM
consumption, as well as the Hard disk usage for the last seven days.
Figure 3. Computer utilization 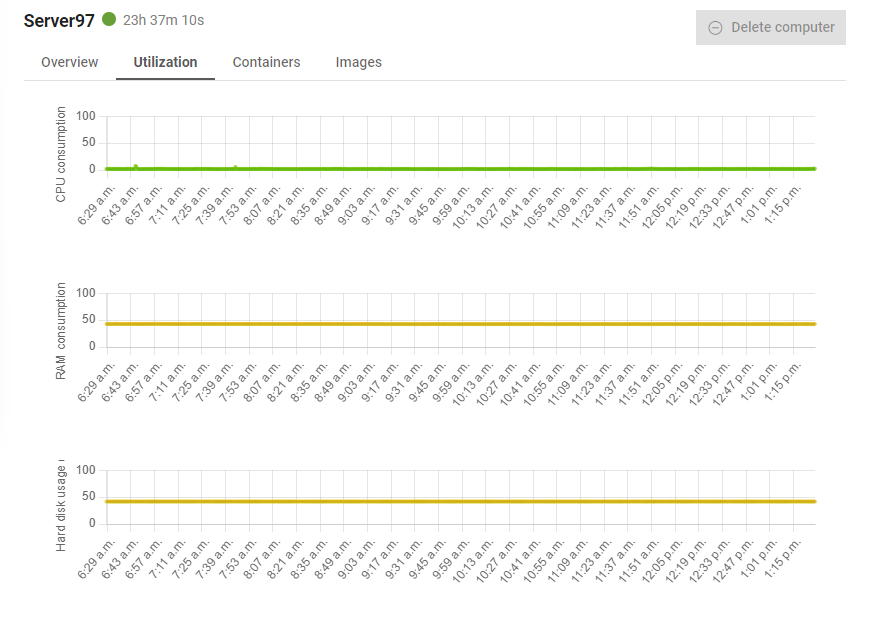
- Containers: This tab features a table of containers with basic informations on the selected machine. Additional information about containers and Logs can be seen in the detailed view of the Container.
- Images: This tab features a table of images with basic informations on the selected machine. Additional information about images can be seen in the detailed view of the Image.
 button. It
is recommended that once a value is copied, you immediately hide the
sensitive value by clicking the
button. It
is recommended that once a value is copied, you immediately hide the
sensitive value by clicking the  button. If you forget to hide the value, it
will be automatically hidden as soon as you leave the page.
button. If you forget to hide the value, it
will be automatically hidden as soon as you leave the page.When the computer is offline, you can delete a computer by clicking on the  button. A computer can only be deleted if there are no jobs
connected with that computer.
button. A computer can only be deleted if there are no jobs
connected with that computer.
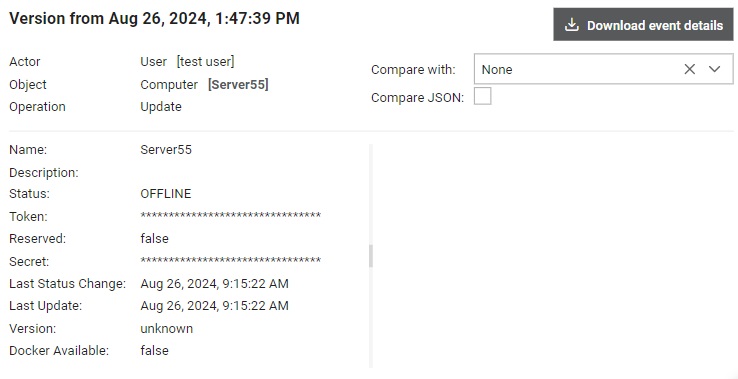
Changes history tab
Changes history for the selected Computer is visible from this tab (Figure 4).
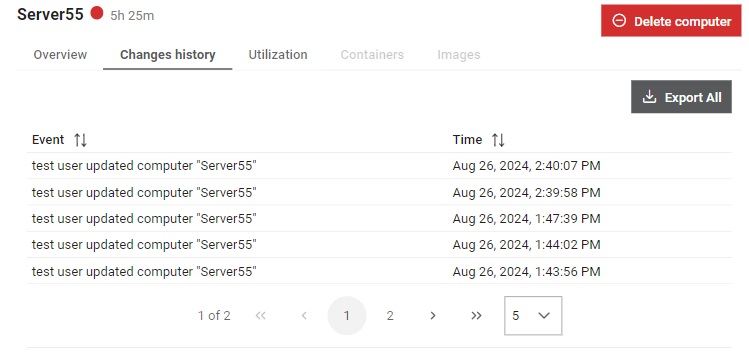
All snapshots (events) will be exported to JSON format and automatically downloaded
by clicking on the  button.
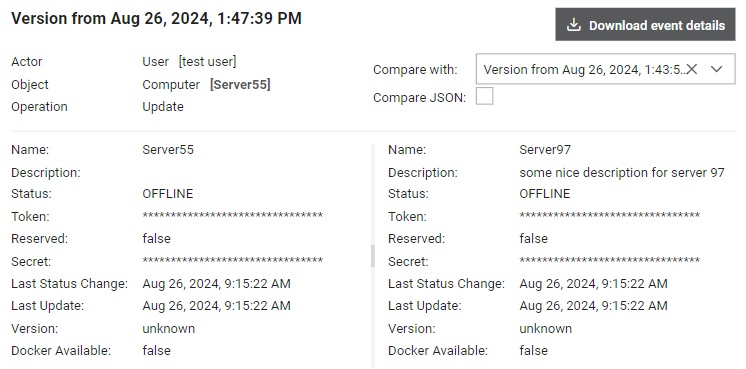
By selecting each line in the table, single snapshot will be shown enabling preview of the made changes
and allowing user to perform comparison between the selected snapshot and and any chosen snapshot.
button.
By selecting each line in the table, single snapshot will be shown enabling preview of the made changes
and allowing user to perform comparison between the selected snapshot and and any chosen snapshot.
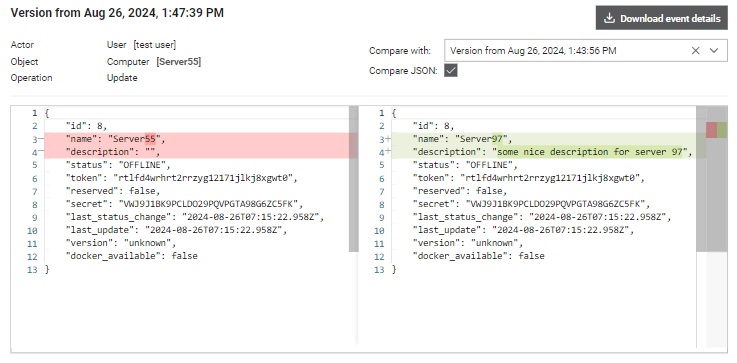
Single snapshot (event) can be exported as JSON and downloaded by clicking on the
 button. Snapshots can be compared through UI or as JSON, with JSON option having
more clearly displayed differences between the two snapshots using Monaco
editor.
button. Snapshots can be compared through UI or as JSON, with JSON option having
more clearly displayed differences between the two snapshots using Monaco
editor.
Create computer
A new computer can be added
by clicking on the 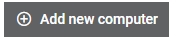 button. This opens the Add new computer dialog box (Figure 8).
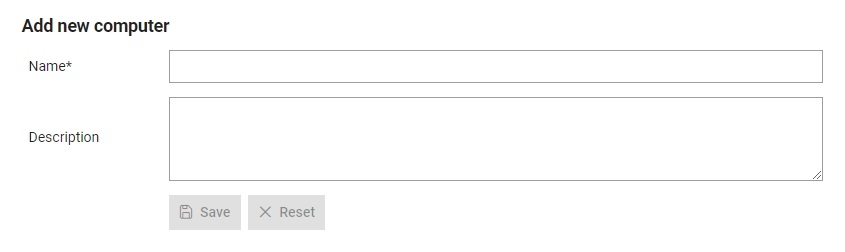
From this menu, you must:
- Assign a name which will be used to refer to the computer throughout the Hub. This name must be unique.
- Write a description of the computer.
- Select Typhoon license that will be provided to Computer when it is started. If 'Default' option is selected, the license that is used by Typhoon Test Hub (site key was provided when Typhoon Test Hub was deployed) will be provided.
Install computer machine
A new computer machine must have installed certain software to be able to run officer and agents. Typhoon Test Hub is best used with Linux Debian 12 distribution (Debian images).
When installing the OS, the first user must be called 'typhoon'. Having another user with ID 1000 is problematic
When installing the OS, do not install a desktop environment. Enable SSH
After installation of Linux Debian OS:
- Install sudo (do
su -, followed byapt-get update, andapt-get install sudo) - Install
nanoif not installed - Change Source list and update it (
sudo nano /etc/apt/sources.listand comment the first line by adding a '#' at the start) - Add 'typhoon' user to sudoers (
sudo nano /etc/sudoersand addtyphoon ALL=(ALL) NOPASSWD: ALLbelow the lineroot ALL=(ALL:ALL) ALL) - Install docker: https://docs.docker.com/engine/install/debian/ After that run:
  sudo systemctl enable docker.service
  sudo systemctl enable containerd.service
  sudo nano /etc/docker/daemon.json
{ "log-driver": "json-file", "log-opts": { "max-size": "100m", "max-file": "3" } } - Python 3.11 (
sudo apt-get install python3.11.4) - Change IP configuration, if desired:
sudo nano /etc/network/interfacesallow-hotplug enp4s0 iface enp4s0 inet static address 192.168.100.100/24 gateway 192.168.100.1 dns-nameservers 192.168.1.1 8.8.8.8 8.8.4.4 sudo systemctl restart networking.service- Reboot
- Install officer (see link below for more details)