Jobs
Overview of Job settings, which define the procedure that will be executed on the Agent.
From the Jobs table (Figure 1), you can see the most
important information about existing jobs. From here you can also create a new job, as
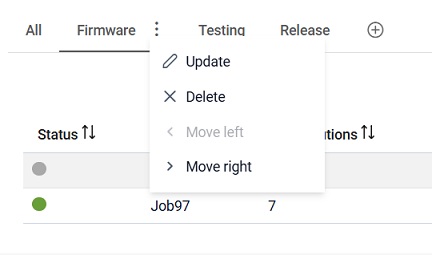
well as duplicate, update, or delete an existing one. Jobs can be grouped under custom
categories. A new group can be created by clicking on the plus button (![]() ) next to the
All tab. More on group management can be found here.
) next to the
All tab. More on group management can be found here.
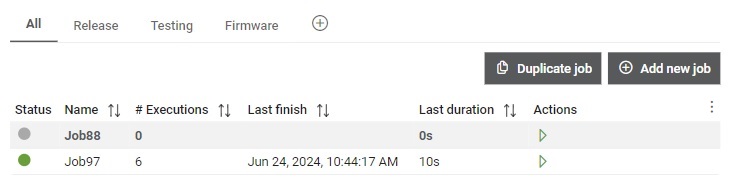
The jobs table shows the following information:
- Status: Status of the last ran execution. When created, Job has a status Idle, until the first execution is started. All possible states for the execution can be found here.
- Name
- Executions: Number of executions made of this job
- Last finish: Date and time of last finished execution of this job
- Last duration: Duration of last execution
Additionally, you can start a job directly from this table.
 button, columns of the table
can be customized - hidden or shown depending on the preference. Columns of the table
can be reordered by using drag and drop in the table header. When positioning cursor in
between two columns, cursor for column resizing will show and enable change of the
column's width. All changes made to the table will be automatically preserved.
button, columns of the table
can be customized - hidden or shown depending on the preference. Columns of the table
can be reordered by using drag and drop in the table header. When positioning cursor in
between two columns, cursor for column resizing will show and enable change of the
column's width. All changes made to the table will be automatically preserved. Job details
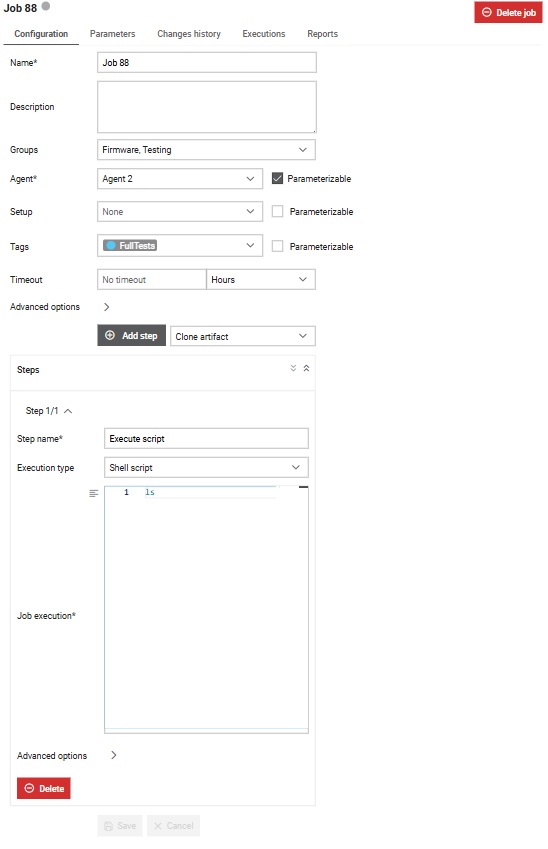
In the Details section, you can find:
- Configuration tab: Here are displayed configuration data.
- Job Parameters tab: For managing parameters in order to easily change how a Job should behave from a Trigger.
- Changes history tab tab: Contains Job's history of changes.
- Executions tab: Contains table of executions that are made by running this job.
- Reports tab: Contains generated reports by running this execution.
You can also delete a job by clicking on the Delete job button.
Configuration tab
The tab displays configuration details for the selected Job and allows for updates. Within the configuration: agent, setup and tags can be marked as parametrizable. If a field is made parametrizable, the Job will have that field available as a parameter when running a job, within the run dialog. Additionally, any trigger connected to the job will also have the parametrizable field available as a parameter. The default value of the parametrized field will be set to the value specified in the job configuration, but the user can change it when running the Job or Trigger.
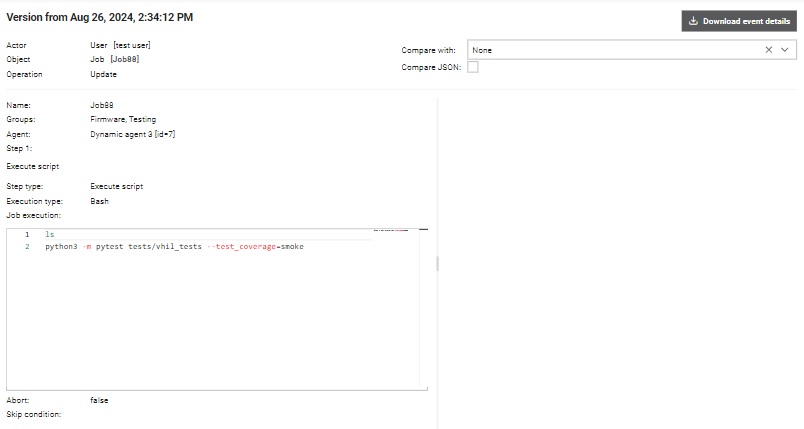
Changes history tab
Changes history for the selected Job is visible from this tab (Figure 4).
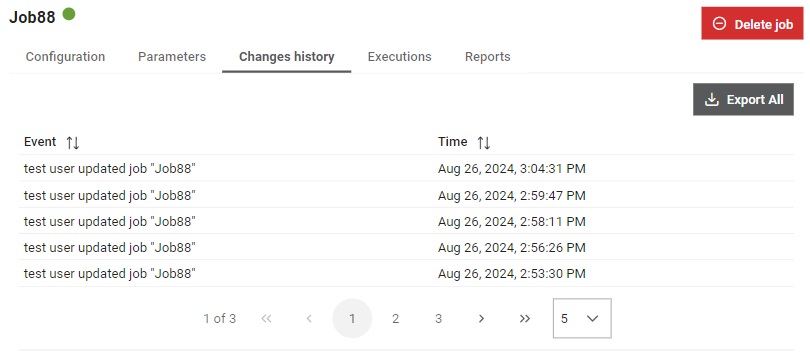
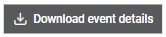
All snapshots (events) will be exported to JSON format and automatically downloaded
by clicking on the  button.
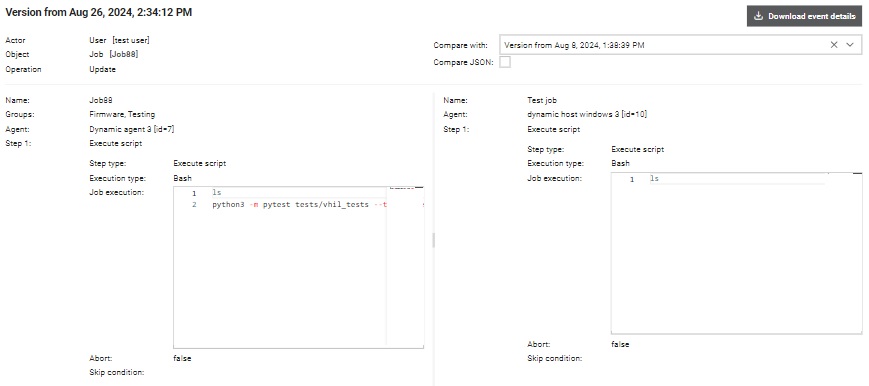
By selecting each line in the table, single snapshot will be shown enabling preview of the made changes
and allowing user to perform comparison between the selected snapshot and and any chosen snapshot.
button.
By selecting each line in the table, single snapshot will be shown enabling preview of the made changes
and allowing user to perform comparison between the selected snapshot and and any chosen snapshot.
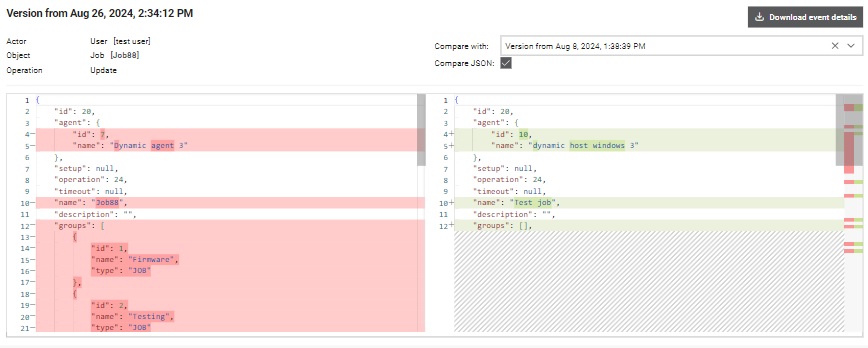
Single snapshot (event) can be exported as JSON and downloaded by clicking on the
 button. Snapshots can be compared through UI or as JSON, with JSON option having
more clearly displayed differences between the two snapshots using Monaco
editor.
button. Snapshots can be compared through UI or as JSON, with JSON option having
more clearly displayed differences between the two snapshots using Monaco
editor.
Deleting job
Clicking on the Delete job opens a confirmation dialog.
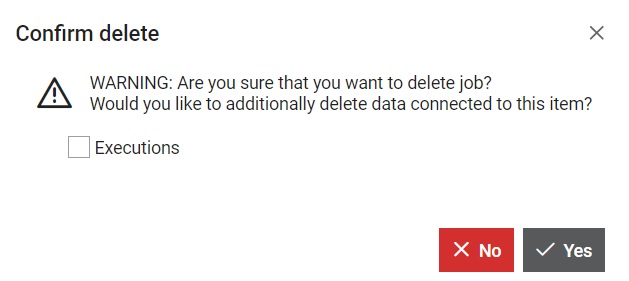
If the Executions box is checked, then all executions made by this Job will be deleted but also additional information in the dialog will be available.
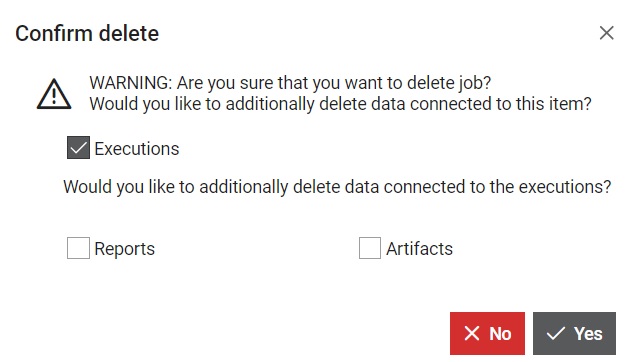
If the Reports box is checked, then all Reports generated by this Job will be deleted.
If the Artifacts box is checked, then all Artifacts generated by this Job will be deleted.
Create job
A new Job can be added by clicking on the  button. This opens the dialog window shown in Figure 10.
An already existing Job can be duplicated by
clicking on the
button. This opens the dialog window shown in Figure 10.
An already existing Job can be duplicated by
clicking on the  button.
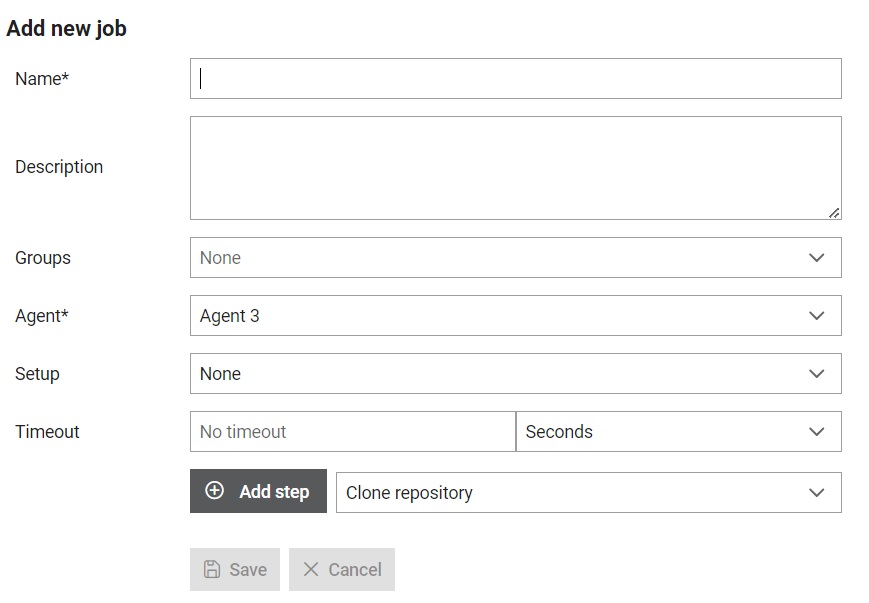
From this dialog, several options for defining the Job are available:
- Give a name which will be used to refer to it throughout the Typhoon Test Hub. The name must be unique.
- Write a description of the Job.
- Select the groups of categories where this Job should be displayed.
- Select one or more Agents that will be used to run this Job.
- Select one or more Setups that will be used
when running this Job.
- Option "Terminate existing connection to HIL devices" enables terminating all existing connections to HIL devices that belong to the selected setup when an execution of the job starts.
- Select one or more Tags that will be used when running this Job.
- Define timeout: time limit that determines how long a process or program can run before it's automatically interrupted.
- Add one or more Job Steps, with the restriction of having at least one. After choosing the desired step type from the dropdown menu and clicking the Add button, the step will be added to the initial form for Job creation.
Advanced options
- Variables
- Retention policy
- Microsoft Teams notifications
Variables section is used to define which Variables are available during the job execution. Depending of the chosen visibility level variable's value is redacted (masked) in the job execution logs and replaced with ***. Job variables can be used inside the Execute script job step as environment variables with name TTH_VARIABLE_{VARIABLE_NAME}.
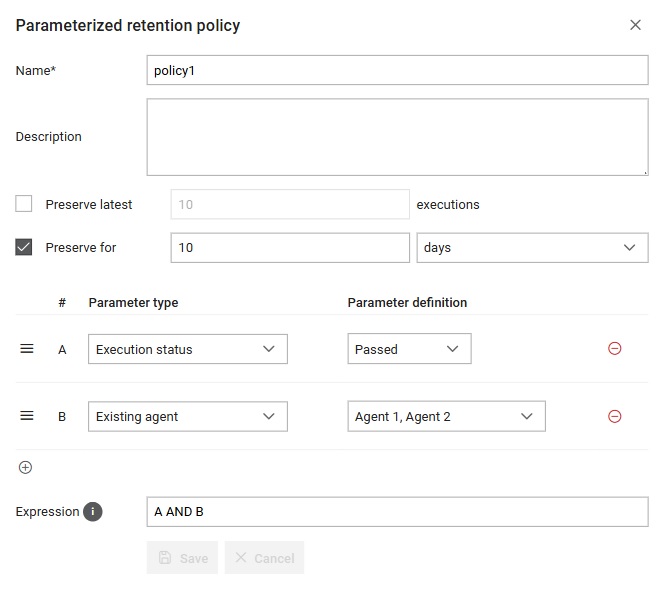
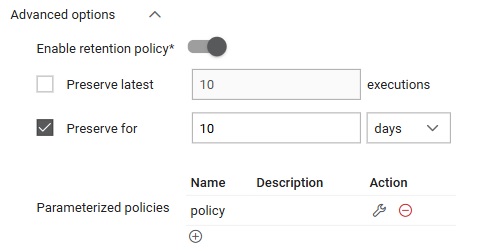
- Preserve latest - where number of executions that would be preserved needs to be entered.
- Preserve for - where period needs to be entered (number and unit, where unit can be days/weeks/months/years) for which executions needs to be preserved.

Start job
When a job has no parameters, like Job97 in Figure 1, clicking on the Start button will cause a new execution to
be made, which will be visible in the corresponding table on the Executions page. If the job has parameters, then the
action button in the table will appear like this:  .
.
Example for a job with parameter
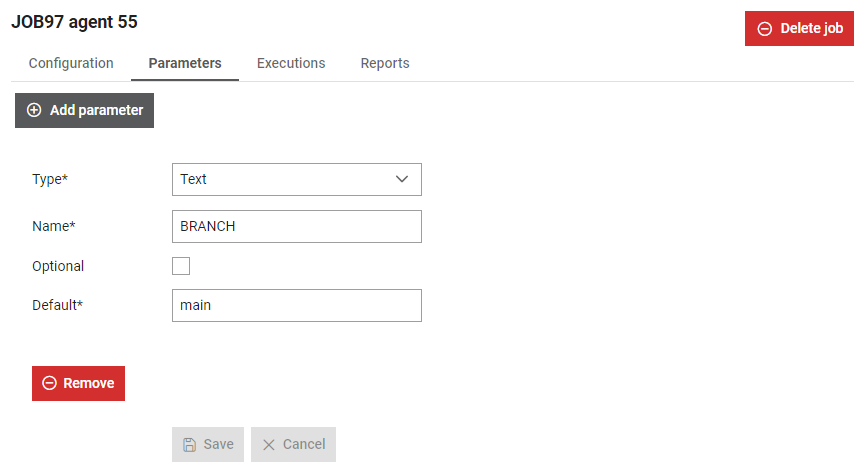
If we want to create a parameter for the Source branch field, we could create a new parameter $BRANCH as in Figure 14.
In this case, the Job's Source branch field will be configured like as in Figure 15.

By clicking on the Play button, the Run Job97 agent 55 with parameters form will pop up.

From here, you can choose to use the default value of the Job parameter or input a new value, and then start the job.